
I’ve discovered some delightful sweet rice cake recipes that are simply too good not to share. From the classic mochi filled with sweet red bean paste to the tropical charm of mango sticky rice cake, there’s something for every taste. Indulge in rich chocolate and almond treats or the refreshing zing of lemon blueberry creations. Each recipe brings its own unique texture and flavor to the table. Ready to satisfy those cravings? Let’s explore these irresistible treats together!
Classic Mochi With Red Bean Filling
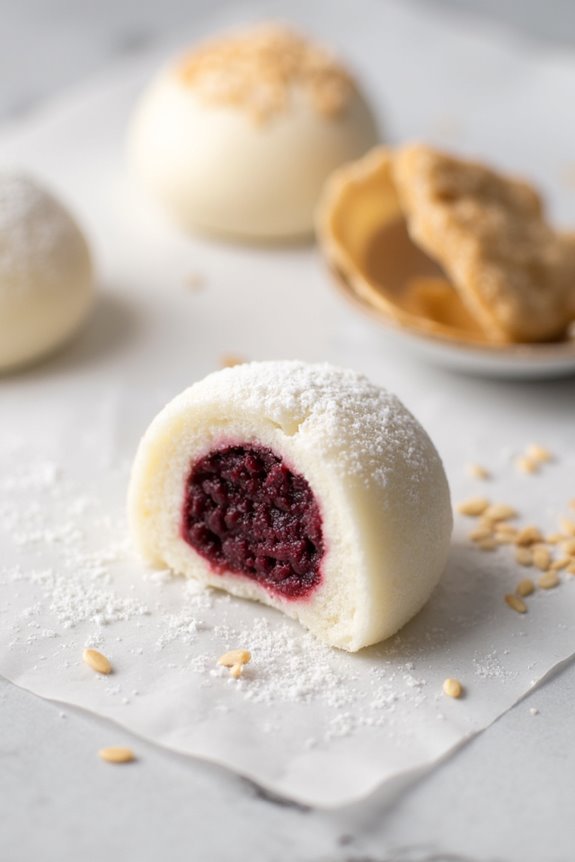
Classic Mochi with Red Bean Filling is a timeless Japanese dessert that beautifully combines the chewy texture of mochi with the sweet, smooth richness of red bean paste. This delightful treat is often enjoyed during special occasions and festivals in Japan, but with this recipe, you can easily prepare it at home to indulge in its unique flavors any time you wish.
Making mochi from scratch can be a rewarding experience, as it allows you to customize the sweetness and texture to your preference. Traditionally, mochi is made with glutinous rice that’s soaked, steamed, and pounded into a smooth dough. However, this recipe uses sweet rice flour, which simplifies the process without sacrificing the authentic taste and texture.
The red bean filling, known as anko, is made from adzuki beans and sugar, providing a perfect balance to the chewy mochi exterior. This recipe will yield enough for 4-6 servings, making it ideal for a small gathering or a delightful homemade treat for your family.
Ingredients for 4-6 Servings:
- 1 cup sweet rice flour (also known as mochiko)
- 3/4 cup water
- 1/4 cup sugar
- Cornstarch, for dusting
- 1 cup red bean paste (anko)
- Optional: sesame seeds or shredded coconut for garnish
Cooking Instructions:
- Prepare the Dough: In a microwave-safe bowl, combine the sweet rice flour, water, and sugar. Stir until smooth and well-mixed. Cover the bowl with plastic wrap, leaving a small vent for steam to escape.
- Cook the Dough: Microwave the mixture on high for 1 minute. Remove and stir the dough. Return to the microwave and heat for another minute. Stir again. Continue this process in 30-second intervals until the dough is thick and sticky, about 3-4 minutes total.
- Shape the Mochi: Dust a clean surface with cornstarch to prevent sticking. Transfer the cooked mochi dough onto the surface. Allow it to cool slightly until it’s safe to handle. Divide the dough into 8-12 equal pieces, depending on your preferred size.
- Fill the Mochi: Flatten each piece of dough into a small disk. Place a small spoonful of red bean paste into the center of each disk. Gently fold the edges over the filling and pinch to seal. Roll the mochi in your hands to form a smooth ball.
- Finish and Serve: Once all the mochi balls are shaped, you can roll them in sesame seeds or shredded coconut if desired. Serve immediately or store in an airtight container to maintain freshness.
Extra Tips:
When working with mochi dough, it’s crucial to keep your hands and working surface well-dusted with cornstarch to prevent sticking. If you find the dough too sticky to handle, dust your hands with more cornstarch.
Additionally, if you prefer a smoother red bean paste, you can blend the anko in a food processor before using it as a filling. Remember to serve mochi fresh, as it tends to harden over time. If you have leftovers, you can briefly microwave them to restore their soft, chewy texture.
Mango Sticky Rice Cake

Mango Sticky Rice Cake is a delightful twist on the traditional Thai dessert, combining the classic flavors of mango sticky rice with the texture and presentation of a cake. This dessert is perfect for those who love the creamy softness of sticky rice paired with the sweet, juicy flavor of ripe mangoes.
By transforming this beloved dish into a cake, you bring a touch of elegance and sophistication to your dessert table, making it an ideal choice for both casual gatherings and special occasions.
The preparation of Mango Sticky Rice Cake involves creating layers of sticky rice and mango slices, topped with a luscious coconut sauce. The key to achieving the perfect balance of flavors lies in using ripe mangoes and high-quality coconut milk.
This recipe is designed to serve 4-6 people, making it an excellent choice for small to medium-sized gatherings. With a little patience and attention to detail, you can create a stunning dessert that not only tastes amazing but also looks beautiful on the plate.
Ingredients:
- 2 cups glutinous (sticky) rice
- 2 ripe mangoes, peeled and sliced
- 1 cup coconut milk
- 1/2 cup sugar
- 1/2 teaspoon salt
- 1 tablespoon cornstarch
- 1/4 cup water
- 1 tablespoon toasted sesame seeds (optional)
Instructions:
- Prepare the Sticky Rice: Rinse the glutinous rice under cold water until the water runs clear. Soak the rice in water for at least 4 hours or overnight to guarantee it cooks evenly.
- Cook the Rice: Drain the soaked rice and place it in a steamer lined with cheesecloth or a steaming basket. Steam the rice over medium-high heat for about 30-40 minutes, or until the rice is tender and sticky.
- Make the Coconut Sauce: In a saucepan, combine the coconut milk, sugar, and salt. Bring the mixture to a gentle simmer over medium heat, stirring occasionally until the sugar dissolves completely.
- Thicken the Sauce: In a small bowl, mix the cornstarch with water until smooth. Slowly stir the cornstarch mixture into the simmering coconut sauce, continuing to stir until the sauce thickens slightly. Remove from heat and let cool.
- Assemble the Cake: In a cake mold or a deep dish, spread a layer of cooked sticky rice evenly across the bottom. Arrange a layer of mango slices over the rice. Pour a portion of the coconut sauce over the mango layer. Repeat the layering process until all ingredients are used, finishing with a drizzle of coconut sauce on top.
- Chill and Serve: Cover the assembled cake with plastic wrap and refrigerate for at least 1 hour to allow the flavors to meld and the cake to set. Before serving, sprinkle with toasted sesame seeds for added flavor and texture, if desired.
Extra Tips:
For the best results, use Thai glutinous rice, as it provides the ideal sticky texture required for this dessert. Confirm that the mangoes are ripe but firm to maintain their shape when sliced.
If you prefer a sweeter dessert, adjust the sugar amount in the coconut sauce to your taste. When steaming the rice, make sure not to overcook it, as it will become mushy and lose its distinctive texture.
Finally, allow the cake to chill thoroughly before serving, as this helps the layers set and enhances the flavor profile of the dish.
Chocolate and Almond Rice Cake
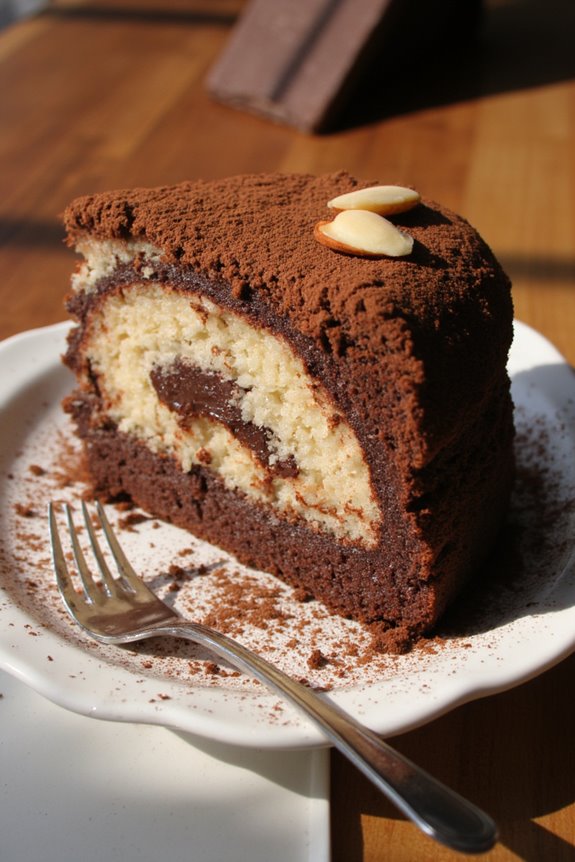
Indulge in the delightful fusion of flavors with this Chocolate and Almond Rice Cake recipe. Perfect for dessert lovers, this cake brings together the creamy texture of rice with the rich taste of chocolate and the subtle, nutty crunch of almonds.
This delectable dessert isn’t only satisfying but also relatively simple to make, ensuring that you can whip it up for any occasion. Whether you’re hosting a dinner party or simply craving something sweet, this recipe is sure to please.
The Chocolate and Almond Rice Cake is a great choice for those who appreciate the combination of chocolate and nuts. The rice serves as the base, offering a unique texture that pairs beautifully with the smooth, melted chocolate and crunchy almonds.
The cake can be served warm or at room temperature, making it a versatile treat that fits well in any setting. Follow this recipe to create a cake that serves 4-6 people, perfect for sharing with friends and family.
Ingredients:
- 1 cup short-grain rice
- 2 cups whole milk
- 1 cup water
- 1/2 cup granulated sugar
- 1 teaspoon vanilla extract
- 1/2 cup dark chocolate chips
- 1/2 cup almond slivers
- 3 large eggs
- 1/4 cup unsalted butter, melted
- A pinch of salt
- 1 tablespoon cocoa powder (for dusting)
- Icing sugar (optional, for garnish)
Instructions:
- Prepare the Rice Base: Begin by rinsing the short-grain rice under cold water until the water runs clear. In a medium saucepan, combine the rice, milk, and water. Bring to a gentle simmer over medium heat, stirring occasionally to prevent sticking.
- Cook the Rice: Once the mixture reaches a simmer, reduce the heat to low. Cover the saucepan and allow the rice to cook for about 20-25 minutes, or until the liquid is absorbed and the rice is tender. Stir occasionally.
- Sweeten and Flavor: Remove the saucepan from heat. Stir in the granulated sugar, vanilla extract, and a pinch of salt. Mix well until the sugar dissolves completely.
- Melt Chocolate: In a separate bowl, melt the dark chocolate chips using a double boiler or microwave in 30-second increments, stirring in between until smooth.
- Combine Ingredients: Preheat your oven to 350°F (175°C). In a large mixing bowl, whisk the eggs and melted butter together. Add the melted chocolate and mix well. Fold in the cooked rice mixture and almond slivers until everything is well combined.
- Bake the Cake: Grease a 9-inch round cake pan or a similar baking dish. Pour the cake mixture into the prepared pan, spreading it evenly. Bake in the preheated oven for 35-40 minutes or until the top is set and slightly golden.
- Cool and Serve: Allow the cake to cool in the pan for about 10 minutes before transferring it to a wire rack. Dust with cocoa powder and icing sugar if desired. Serve warm or at room temperature.
Extra Tips:
For an extra touch of flavor, consider adding a tablespoon of almond liqueur to the rice mixture before baking. This will enhance the almond flavor, making the cake even more aromatic.
You can also experiment by adding a handful of raisins or dried cranberries for a fruity twist. If you prefer a crunchier texture, toast the almond slivers lightly before adding them to the mix.
This cake pairs wonderfully with a dollop of whipped cream or a scoop of vanilla ice cream for an even more indulgent dessert experience.
Coconut Pandan Rice Cake

Coconut Pandan Rice Cake is a delightful and fragrant dessert that combines the rich flavors of coconut and pandan, a tropical plant with a unique, sweet aroma. This cake is popular in Southeast Asia and is often enjoyed as a snack or dessert. The combination of sticky rice, pandan extract, and coconut milk creates a moist and chewy texture that’s hard to resist. It’s a perfect treat for those who enjoy trying new and exotic flavors.
Making Coconut Pandan Rice Cake involves a few simple steps, and the result is a beautiful green cake that’s both visually appealing and delicious. The pandan extract gives the cake its signature green hue, while the coconut milk adds a creamy richness that balances the sweetness of the sugar. This recipe will serve 4-6 people, making it ideal for small gatherings or as a family treat.
Ingredients for 4-6 servings:
- 2 cups glutinous rice
- 1 cup coconut milk
- 1/2 cup sugar
- 1/2 teaspoon salt
- 1 tablespoon pandan extract
- 1/4 cup grated coconut (optional, for garnish)
Cooking Instructions:
- Prepare the Rice: Begin by rinsing the glutinous rice thoroughly under cold water until the water runs clear. This removes excess starch and prevents the rice from becoming too sticky.
- Cook the Rice: In a large saucepan, combine the rinsed rice with 2 1/2 cups of water. Bring to a boil over medium heat, then reduce the heat to low and cover. Let it simmer for about 15-20 minutes, or until the rice is tender and all the water is absorbed.
- Make the Coconut Mixture: While the rice is cooking, in another saucepan, combine the coconut milk, sugar, and salt. Heat the mixture over medium heat, stirring constantly until the sugar is fully dissolved. Remove from heat and stir in the pandan extract.
- Combine Rice and Coconut Mixture: Once the rice is cooked, gently stir in the coconut milk mixture until the rice is evenly coated and has absorbed the flavors. Be careful not to mash the rice.
- Steam the Cake: Transfer the rice mixture into a greased 8-inch cake pan. Spread it out evenly and press down gently to compact the mixture. Place the cake pan in a steamer and steam for about 30-35 minutes on medium heat.
- Cool and Serve: Once steamed, remove the cake from the steamer and let it cool completely before slicing. If desired, sprinkle with grated coconut before serving for extra texture and flavor.
Extra Tips:
When preparing Coconut Pandan Rice Cake, it’s important to use glutinous rice, also known as sticky rice, to achieve the chewy texture characteristic of this dessert. If fresh pandan leaves are available, you can blend them with some water and strain to make your own pandan extract for a more authentic flavor.
Additionally, make sure not to overcook the rice, as it will continue to cook slightly while steaming. Allow the cake to cool completely before slicing to ensure clean, neat pieces. Enjoy your Coconut Pandan Rice Cake with a cup of tea or coffee for a delightful treat!
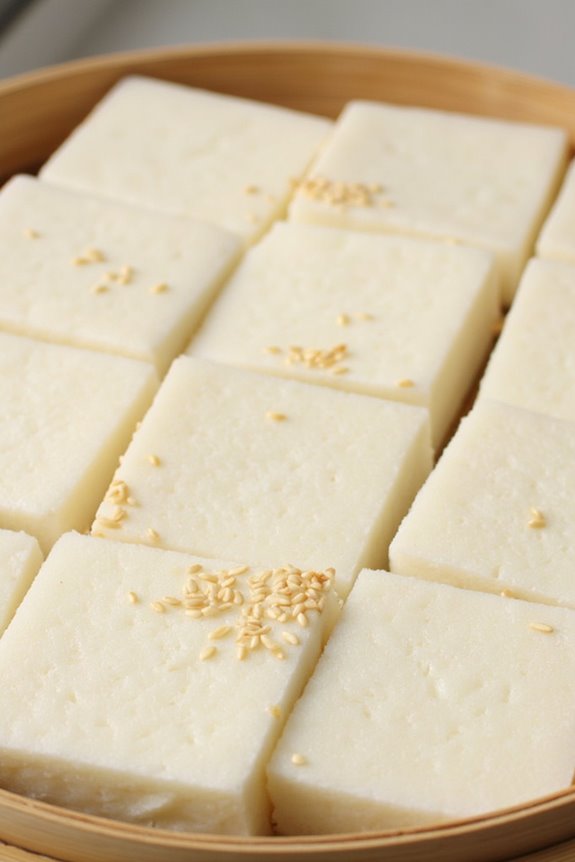
Matcha Green Tea Rice Cake
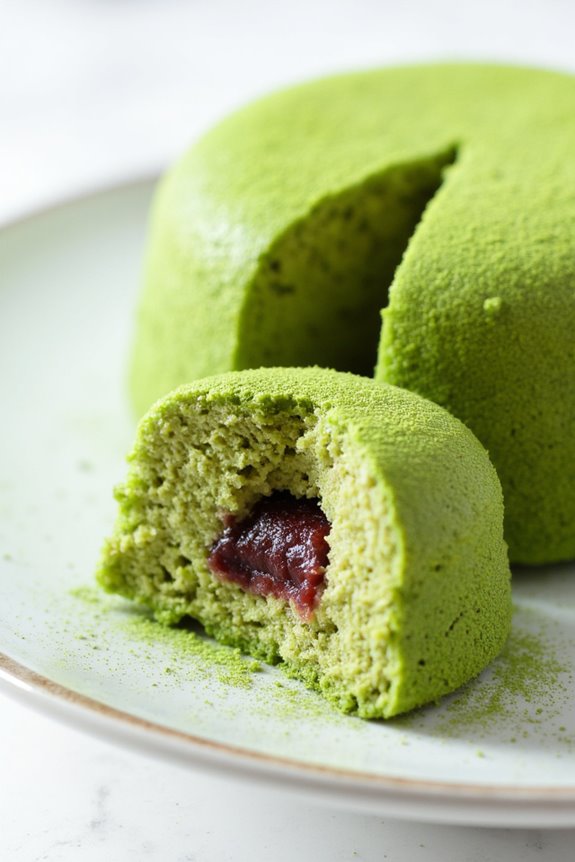
Matcha Green Tea Rice Cake is a delightful fusion of traditional Asian flavors and modern dessert trends. This sweet treat combines the earthy notes of matcha green tea with the sticky sweetness of rice cake, creating a dessert that’s both unique and comforting. Perfect for an afternoon tea or a special occasion, this rice cake is sure to impress with its vibrant green color and irresistible flavor.
To make this dish, you’ll need to start by preparing the rice cake base with glutinous rice flour, which gives it its distinctive chewy texture. The addition of matcha powder not only adds a beautiful green hue but also imparts a subtle, aromatic taste. This recipe serves 4-6 people and is perfect for sharing with friends and family.
Ingredients:
- 2 cups glutinous rice flour
- 1 1/2 cups water
- 1/4 cup sugar
- 2 tablespoons matcha green tea powder
- 1/2 teaspoon salt
- 1 tablespoon vegetable oil
- 1/2 cup red bean paste (optional, for filling)
- Cornstarch, for dusting
Instructions:
- Prepare the Steamer: Fill a large pot with water and bring it to a simmer. Place a steaming rack or a bamboo steamer on top, ensuring it doesn’t touch the water.
- Mix Dry Ingredients: In a large bowl, combine the glutinous rice flour, sugar, matcha powder, and salt. Stir until well mixed.
- Add Wet Ingredients: Gradually add water to the dry ingredients, stirring continuously until you have a smooth batter. Make sure there are no lumps.
- Grease the Steaming Pan: Lightly grease a round or square cake pan with vegetable oil to prevent sticking.
- Pour and Steam: Pour the batter into the prepared pan. Cover the pan with foil to prevent water droplets from dripping onto the cake. Place the pan in the steamer and cover with a lid. Steam for about 45 minutes or until the rice cake is set and firm to the touch.
- Cool and Dust: Once cooked, remove the rice cake from the steamer and allow it to cool completely. Dust a clean surface with cornstarch and turn the cake out onto it.
- Optional Filling: If using red bean paste, cut the rice cake into squares, flatten slightly, and place a small amount of red bean paste in the center. Fold the edges over to encase the filling.
- Final Touches: Dust the top of the rice cake with a little more matcha powder before serving, if desired, for an extra burst of color and flavor.
Extra Tips:
Ensure the matcha powder is well incorporated into the batter to avoid clumps, which can create an uneven flavor. When steaming, make sure the water in the pot doesn’t touch the bottom of the pan to prevent the cake from becoming soggy.
If you prefer a sweeter rice cake, you can adjust the sugar to taste. For an added twist, consider using different fillings like sweetened coconut or crushed nuts to cater to your taste preferences.
Peanut Butter and Jelly Rice Cake
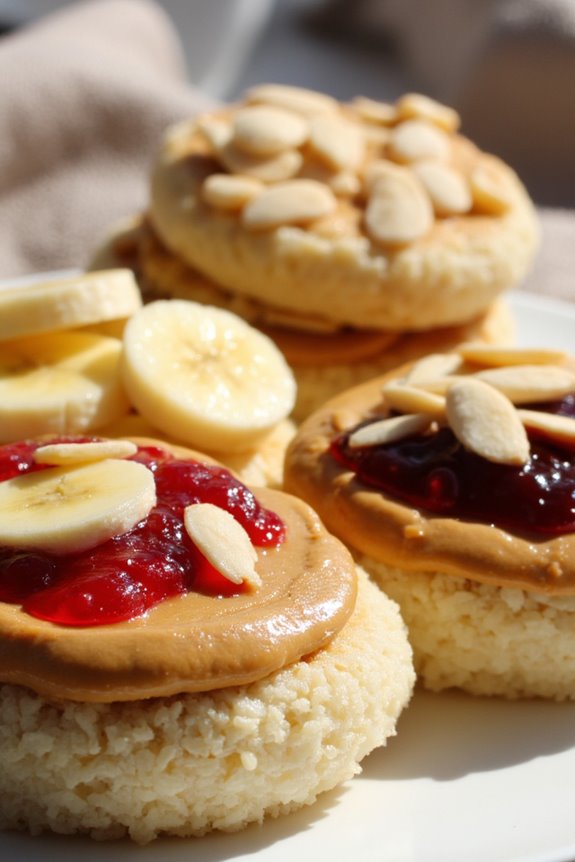
Peanut Butter and Jelly Rice Cake is a delightful twist on the classic PB&J sandwich, offering a sweet and crunchy treat that’s perfect for breakfast, snack time, or even dessert. This recipe combines the nutty richness of peanut butter with the sweet, fruity burst of jelly, all layered on top of a crispy rice cake.
It’s a simple yet satisfying dish that appeals to both children and adults alike. The best part? It’s quick to make and doesn’t require any cooking, so you can enjoy this treat in just a few minutes!
This recipe is perfect for serving 4-6 people, making it an ideal choice for family gatherings or a fun snack to share with friends. The combination of flavors isn’t only delicious but also versatile, as you can experiment with different types of peanut butter and jelly to suit your taste preferences.
Whether you’re using creamy or crunchy peanut butter, or opting for strawberry, grape, or raspberry jelly, there’s plenty of room for customization in this delightful treat.
Ingredients:
- 6 rice cakes
- 1 cup creamy or crunchy peanut butter
- 1 cup jelly (strawberry, grape, or raspberry)
- Fresh fruit slices (such as bananas or strawberries, optional)
- Chopped nuts (such as peanuts or almonds, optional)
Instructions:
- Prepare the Base: Lay out the rice cakes on a flat surface, such as a large plate or cutting board, making sure they’re evenly spaced.
- Spread the Peanut Butter: Using a butter knife or a spoon, spread a generous layer of peanut butter on each rice cake. Aim for about 2-3 tablespoons per rice cake, ensuring the entire surface is covered.
- Add the Jelly: On top of the peanut butter, spread 1-2 tablespoons of your chosen jelly on each rice cake. Try to spread it evenly to create a nice layer over the peanut butter.
- Optional Toppings: If desired, add fresh fruit slices or chopped nuts on top of the jelly for added texture and flavor. Arrange the toppings artfully to enhance the visual appeal of the dish.
- Serve and Enjoy: Once assembled, serve the Peanut Butter and Jelly Rice Cakes immediately. They’re best enjoyed fresh to maintain their crisp texture.
Extra Tips:
When preparing Peanut Butter and Jelly Rice Cakes, consider using a variety of different jellies and nut butters to keep things interesting. For a healthier version, opt for natural peanut butter and low-sugar jelly.
If you want a bit of a crunch, go for crunchy peanut butter or add a sprinkle of granola on top. To prevent the rice cakes from becoming soggy, assemble them just before serving.
This dish is highly versatile, so feel free to get creative with toppings and customize them to your liking!
Black Sesame Rice Cake
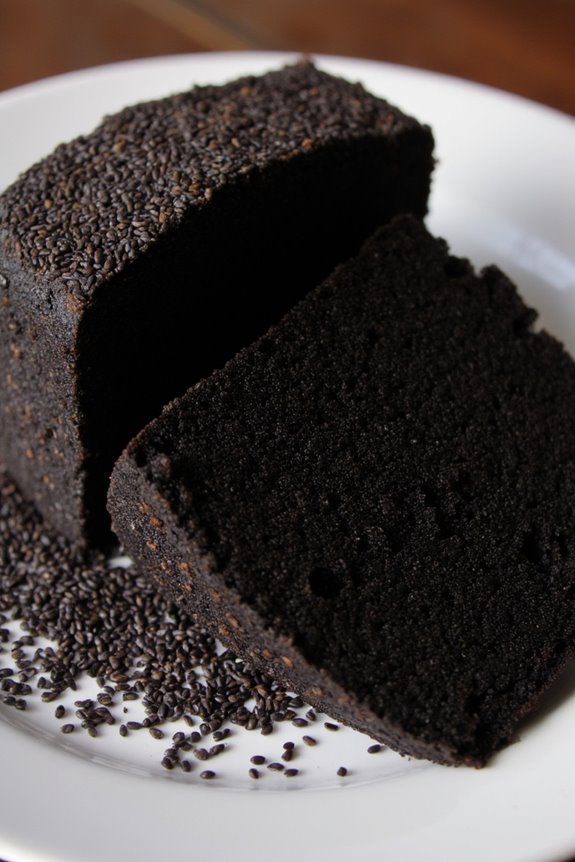
Indulge in the nutty and slightly sweet flavor of Black Sesame Rice Cake, a delightful treat that combines the richness of black sesame seeds with the soft, chewy texture of rice cakes. This Asian-inspired dessert is perfect for any occasion, offering a unique taste that’s both comforting and satisfying.
With its jet-black appearance and aromatic sesame notes, this cake isn’t only a feast for the taste buds but also a visual delight. Perfect for serving at family gatherings or special celebrations, this Black Sesame Rice Cake recipe is designed to serve 4-6 people.
The preparation process is simple yet rewarding, allowing you to enjoy a homemade dessert that stands out from the ordinary. Gather the ingredients and follow the easy steps to create a memorable dessert experience.
Ingredients (Serves 4-6):
- 1 cup glutinous rice flour
- 1/2 cup black sesame seeds
- 1/2 cup sugar
- 1 cup coconut milk
- 1/4 cup water
- 2 tablespoons vegetable oil
- 1/4 teaspoon salt
- 1 teaspoon baking powder
Cooking Instructions:
- Prepare the sesame seeds: Toast the black sesame seeds in a dry skillet over medium heat for about 3-5 minutes, stirring frequently until they’re fragrant. Allow them to cool, then grind them into a fine powder using a spice grinder or mortar and pestle.
- Mix dry ingredients: In a mixing bowl, combine the glutinous rice flour, ground black sesame seeds, sugar, salt, and baking powder. Stir well to guarantee all dry ingredients are evenly distributed.
- Combine wet ingredients: In another bowl, mix the coconut milk, water, and vegetable oil. Stir until the ingredients are fully combined and smooth.
- Create the batter: Gradually add the wet ingredients to the dry ingredients, stirring constantly to avoid lumps. Mix until you have a smooth, thick batter.
- Preheat and prepare the pan: Preheat your oven to 350°F (175°C). Grease a 9-inch round cake pan with a bit of vegetable oil to prevent the cake from sticking.
- Pour and bake: Pour the batter into the prepared cake pan, spreading it evenly. Tap the pan lightly on the counter to remove any air bubbles. Bake in the preheated oven for 30-35 minutes until the cake is firm and a toothpick inserted into the center comes out clean.
- Cool and serve: Allow the cake to cool in the pan on a wire rack for at least 10 minutes before removing it. Slice into portions and serve either warm or at room temperature.
Extra Tips:
For an even more pronounced sesame flavor, consider reserving a tablespoon of whole toasted black sesame seeds to sprinkle on top of the batter before baking. This won’t only enhance the taste but also add a pleasing texture to the cake.
Additionally, if you prefer a sweeter cake, slightly increase the amount of sugar to suit your taste. The cake pairs wonderfully with a cup of green tea or a scoop of vanilla ice cream for a delightful dessert combination.
Strawberry and Cream Rice Cake
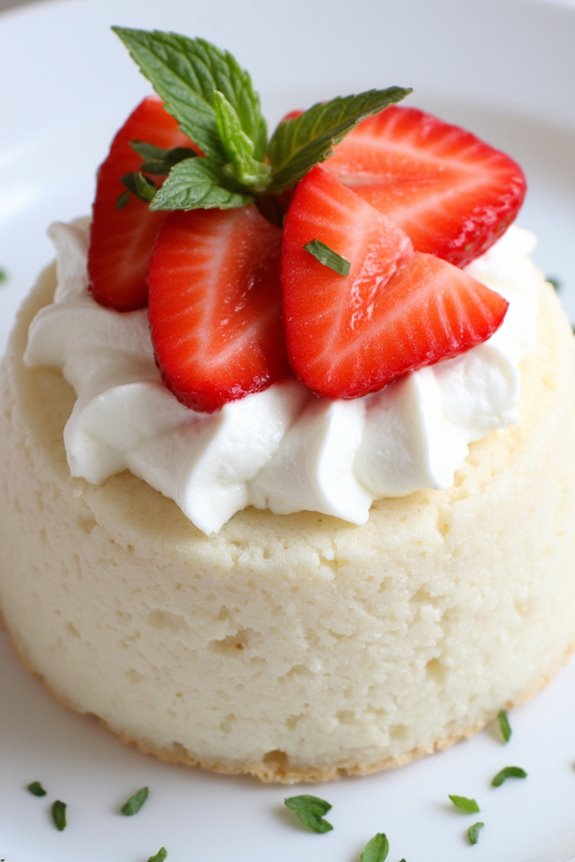
Strawberry and Cream Rice Cake is a delightful dessert that combines the soft, chewy texture of rice cakes with the fresh, juicy flavor of strawberries, all topped with a luscious cream. This dessert is perfect for spring and summer gatherings, offering a revitalizing and sweet ending to any meal.
The combination of sweet strawberries and creamy topping over the rice cake base makes it not only a treat for the taste buds but also visually appealing.
This recipe is designed to serve 4-6 people, making it ideal for a small party or family dessert. The rice cake base is made from glutinous rice flour, which gives it a unique texture, while the topping consists of fresh strawberries and a smooth cream mixture.
The balance of flavors and textures is what makes this Strawberry and Cream Rice Cake a favorite among sweet rice cake variations.
Ingredients:
- 2 cups glutinous rice flour
- 1 1/2 cups water
- 1/2 cup sugar
- 1/4 teaspoon salt
- 1 cup heavy cream
- 1/4 cup powdered sugar
- 1 teaspoon vanilla extract
- 2 cups fresh strawberries, hulled and sliced
- 1 tablespoon lemon juice
- 2 tablespoons honey
- Mint leaves for garnish (optional)
Cooking Instructions:
1. Prepare the Rice Cake Base: In a large bowl, mix the glutinous rice flour, water, sugar, and salt until smooth. Pour the mixture into a greased, heatproof dish and steam over boiling water for 20-25 minutes, or until the cake is set and firm to the touch.
Allow it to cool completely before cutting.
2. Make the Cream Topping: In a separate bowl, whip the heavy cream with the powdered sugar and vanilla extract until soft peaks form. Be careful not to overwhip, as this could turn the cream into butter.
3. Prepare the Strawberries: In a small bowl, toss the sliced strawberries with lemon juice and honey. Let them sit for about 10 minutes to allow the flavors to meld.
4. Assemble the Cake: Once the rice cake is cooled, cut it into squares or rectangles. Spoon a generous amount of whipped cream over each piece, then top with the marinated strawberries.
5. Garnish and Serve: Optionally, garnish each piece with mint leaves for a touch of color and freshness. Serve immediately for the best texture and flavor.
Extra Tips:
When making the rice cake, verify the steaming dish is well-greased to prevent the cake from sticking. If you find the rice cake too sticky to handle when cutting, a knife dipped in water can help make clean cuts.
Additionally, the strawberries can be prepared ahead of time and stored in the refrigerator to allow the flavors to deepen. Experiment with different fruit combinations if desired, such as blueberries or raspberries, to create your own variation of this classic dessert.
Lemon Blueberry Rice Cake

Lemon Blueberry Rice Cake is a delightful dessert that combines the tangy zest of lemons with the sweet burst of blueberries, all nestled within the soft and chewy texture of a rice cake. This tasty treat is perfect for a summer afternoon tea or as a light dessert after a hearty meal. The balance of flavors makes it a favorite among those who enjoy a revitalizing and not overly sweet dessert option.
The rice cake base provides a wonderful chewy texture that contrasts beautifully with the juicy blueberries and the vibrant flavor of lemon. The lemon zest and juice not only add a bright flavor but also enhance the sweetness of the blueberries, making each bite a burst of fresh flavor. With this recipe, you’ll be able to make a Lemon Blueberry Rice Cake that serves 4-6 people, perfect for sharing with family and friends.
Ingredients:
- 1 cup of white short-grain rice
- 2 cups of water
- 1 cup of coconut milk
- 1/2 cup of granulated sugar
- 2 tablespoons of lemon zest
- 1/4 cup of fresh lemon juice
- 1 teaspoon of vanilla extract
- 1/2 teaspoon of salt
- 1 cup of fresh blueberries
- 2 tablespoons of cornstarch
- 2 tablespoons of water
- 1/4 cup of powdered sugar (for dusting)
Instructions:
- Prepare the Rice Base: Rinse the rice under cold water until the water runs clear. In a medium saucepan, combine the rice and 2 cups of water. Bring to a boil over medium-high heat, then reduce the heat to low, cover, and simmer for about 15-20 minutes, or until the rice is fully cooked and water is absorbed.
- Mix Ingredients: In a large mixing bowl, combine the cooked rice with coconut milk, granulated sugar, lemon zest, lemon juice, vanilla extract, and salt. Stir well to verify all ingredients are thoroughly mixed.
- Incorporate Blueberries: Gently fold in the fresh blueberries, being careful not to crush them. This will guarantee that they remain whole and provide bursts of flavor throughout the cake.
- Thicken the Mixture: In a small bowl, mix the cornstarch with 2 tablespoons of water until smooth. Add this mixture to the rice and blueberry mixture and stir until well combined. This will help the cake set as it cooks.
- Bake the Cake: Preheat your oven to 350°F (175°C). Grease a 9-inch round baking pan and pour the rice mixture into the pan. Spread it evenly with a spatula. Bake for 40-45 minutes, or until the edges are golden brown and the center is set.
- Cool and Serve: Remove the cake from the oven and let it cool in the pan for about 10 minutes. Then transfer it to a wire rack to cool completely. Once cooled, dust the top with powdered sugar before slicing and serving.
Extra Tips: For best results, use fresh blueberries as they offer the best flavor and texture. If fresh ones are unavailable, frozen blueberries can be used, but make sure to thaw and drain them well before adding to the mixture.
Additionally, taste the lemon juice before adding it to the mix; if it seems too tart, you can adjust the sugar slightly to balance the flavor. This cake can also be made a day in advance, as it tends to taste even better after the flavors have melded overnight. Enjoy your Lemon Blueberry Rice Cake with a cup of tea or coffee for a perfect treat!
Taro and Coconut Milk Rice Cake
Taro and Coconut Milk Rice Cake is a delightful and aromatic dish that combines the natural sweetness of taro with the rich creaminess of coconut milk. This traditional dessert is popular in many Southeast Asian countries and is perfect for those who enjoy unique flavors and textures. The taro provides a subtle earthiness, while the coconut milk adds a smooth and velvety touch to the overall taste, making it a perfect treat for any occasion.
The preparation of Taro and Coconut Milk Rice Cake is both simple and rewarding, as it allows you to savor the harmonious blend of these distinct ingredients. The cake is typically steamed, which guarantees a moist texture that melts in your mouth. Whether you’re a seasoned cook or a novice in the kitchen, this recipe is straightforward and easy to follow, allowing you to create a delicious dessert that your family and friends will enjoy.
Ingredients (Serves 4-6):
- 2 cups glutinous rice flour
- 1 cup taro, peeled and grated
- 1 cup coconut milk
- 1 cup sugar
- 1/2 cup water
- 1/4 teaspoon salt
- 1 teaspoon vanilla extract
- 1 tablespoon vegetable oil
Cooking Instructions:
- Prepare the Taro: Begin by peeling and grating the taro. Make sure the pieces are fine for a smooth texture in the cake. Set aside.
- Mix Dry Ingredients: In a large mixing bowl, combine the glutinous rice flour and salt. Mix well to make certain the salt is evenly distributed throughout the flour.
- Combine Wet Ingredients: In a separate bowl, whisk together the coconut milk, sugar, water, and vanilla extract. Stir until the sugar is completely dissolved, forming a smooth liquid mixture.
- Integrate Taro: Add the grated taro into the liquid mixture. Stir gently to make sure the taro is evenly coated with the coconut mixture.
- Form the Batter: Gradually add the wet mixture to the dry ingredients, stirring continuously to avoid lumps. Mix until you have a smooth batter.
- Prepare the Steaming Pan: Grease a steaming pan or baking dish with vegetable oil to prevent sticking. Pour the batter into the prepared pan, spreading it evenly.
- Steam the Cake: Place the pan in a steamer. Cover and steam over medium heat for about 45-50 minutes, or until the cake is firm and a toothpick inserted in the center comes out clean.
- Cool and Serve: Once cooked, remove the cake from the steamer and allow it to cool slightly. Slice into squares and serve warm or at room temperature.
Extra Tips:
For an added twist, you can sprinkle some toasted sesame seeds or shredded coconut on top of the cake before steaming to enhance both the flavor and presentation.
Make sure the taro is evenly grated to maintain a consistent texture throughout the cake. If you prefer a less sweet version, you can reduce the sugar according to your taste.
Pumpkin Spice Rice Cake

Pumpkin Spice Rice Cake is a delightful twist on the traditional rice cake, infusing it with the warm and comforting flavors of pumpkin spice. This recipe is perfect for fall gatherings or when you want a cozy treat that pairs well with a hot cup of tea or coffee.
The combination of pumpkin puree and aromatic spices like cinnamon, nutmeg, and cloves creates a rich and fragrant cake that will surely become a family favorite. The texture of this cake is light and moist, thanks to the use of rice flour which also makes it gluten-free.
It’s easy to prepare and doesn’t require any special equipment, making it accessible for home bakers of all skill levels. This recipe serves 4-6 people, so it’s perfect for sharing with friends and family.
Ingredients:
- 1 1/2 cups rice flour
- 1 cup pumpkin puree
- 1 cup granulated sugar
- 1/2 cup coconut milk
- 2 teaspoons pumpkin spice mix
- 1 teaspoon baking powder
- 1/2 teaspoon salt
- 2 large eggs
- 1/4 cup vegetable oil
- 1 teaspoon vanilla extract
Cooking Instructions:
- Preheat and Prepare: Preheat your oven to 350°F (175°C). Grease a 9-inch round cake pan or line it with parchment paper to prevent sticking.
- Mix Dry Ingredients: In a large mixing bowl, combine the rice flour, pumpkin spice mix, baking powder, and salt. Stir until all the dry ingredients are well combined.
- Prepare Wet Ingredients: In another bowl, whisk together the pumpkin puree, granulated sugar, coconut milk, eggs, vegetable oil, and vanilla extract. Mix until smooth and well incorporated.
- Combine Mixtures: Gradually add the wet ingredients to the dry ingredients, stirring gently until just combined. Be careful not to overmix, as this can lead to a denser cake.
- Bake: Pour the batter into the prepared cake pan, spreading it evenly. Bake in the preheated oven for 30-35 minutes, or until a toothpick inserted into the center comes out clean.
- Cool and Serve: Allow the cake to cool in the pan for about 10 minutes before transferring it to a wire rack to cool completely. Once cooled, slice and serve.
Extra Tips: For an extra flavor boost, consider adding a handful of chopped nuts or dried cranberries to the batter before baking. Additionally, if you prefer a sweeter cake, you can top it with a simple glaze made from powdered sugar and a bit of milk or add a dollop of whipped cream.
If you’re looking for a vegan version, replace the eggs with flax eggs and verify that the sugar and other ingredients used are vegan-friendly.
Pineapple Upside-Down Rice Cake
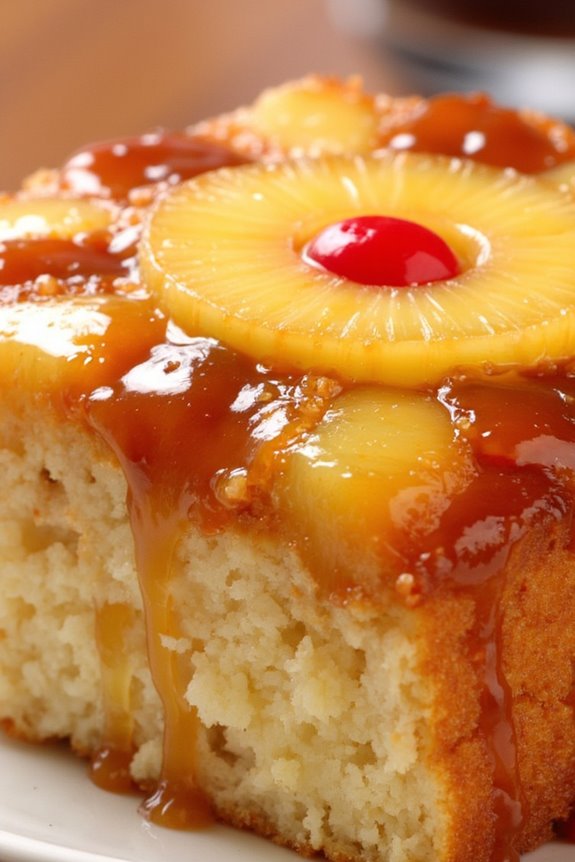
Pineapple Upside-Down Rice Cake is a delightful twist on the classic dessert, combining the tropical sweetness of pineapple with the comforting, sticky texture of rice cake. This dessert is perfect for those who love a fusion of traditional and exotic flavors.
The caramelized layer of pineapple and brown sugar creates a beautiful, glossy top that pairs wonderfully with the rich and chewy rice cake base. It’s a dessert that’s bound to impress both in appearance and taste.
This recipe is designed to serve 4-6 people and is ideal for gatherings or special occasions. The combination of ingredients in this recipe will result in a dessert that’s both satisfying and memorable. By following the instructions carefully, you’ll be able to create a delicious treat that everyone will enjoy.
The key to success with this recipe is to guarantee even caramelization of the sugar and maintaining the right texture in the rice cake.
Ingredients:
- 1 cup sweet rice (glutinous rice)
- 1 1/2 cups coconut milk
- 1/2 cup granulated sugar
- 1/2 teaspoon salt
- 1 tablespoon vanilla extract
- 1/4 cup brown sugar
- 1/4 cup unsalted butter
- 1 can (about 20 oz) pineapple slices, drained
- Maraschino cherries (optional, for garnish)
Cooking Instructions:
- Prepare the Rice Mixture: Rinse the sweet rice under cold water until the water runs clear. In a large pot, combine the rinsed rice, coconut milk, granulated sugar, salt, and vanilla extract. Bring the mixture to a boil over medium heat, then reduce the heat to low, cover, and simmer for about 20 minutes or until the rice is tender and the liquid is absorbed.
- Caramelize the Topping: Preheat your oven to 350°F (175°C). In a small saucepan, melt the butter and brown sugar over medium heat, stirring continuously until the sugar is dissolved and the mixture is smooth. Pour this caramel mixture into the bottom of a 9-inch round cake pan, spreading it evenly.
- Arrange Pineapple Slices: Arrange the pineapple slices on top of the caramel in the cake pan. If desired, place a maraschino cherry in the center of each pineapple slice for a traditional look.
- Add Rice Mixture: Once the rice is cooked, gently spread it over the pineapple slices in the cake pan, pressing down lightly to guarantee it’s evenly distributed.
- Bake the Cake: Place the cake pan in the preheated oven and bake for 30 minutes, or until the rice begins to set and the edges turn golden brown.
- Cool and Serve: Allow the cake to cool in the pan for about 10 minutes. Then, carefully invert the cake onto a serving platter so that the caramelized pineapple is on top. Serve warm or at room temperature.
Extra Tips:
For best results, make certain the rice is cooked until just tender, as overcooking can lead to a mushy texture. You can use fresh pineapple if you prefer, but make sure to cut it into rings and core it before using.
If you want to add a hint of spice, consider adding a pinch of cinnamon or nutmeg to the rice mixture. Finally, confirm the cake is fully cooled before inverting to prevent the caramel topping from sticking to the pan.
Enjoy your Pineapple Upside-Down Rice Cake with a scoop of vanilla ice cream for an extra special treat!